Starting a fire with a starter stick is an essential skill for outdoor adventurers, and with the right supplies and techniques, it can be pretty straightforward.
In this blog post, we'll guide you through every step - from gathering supplies to creating a safe environment for your fire.
Plus, we'll give some tips on making it last longer too! So keep reading if you're ready to learn more about starting fires with a starter stick!

Overview of How to Start a Fire with a Starter Stick
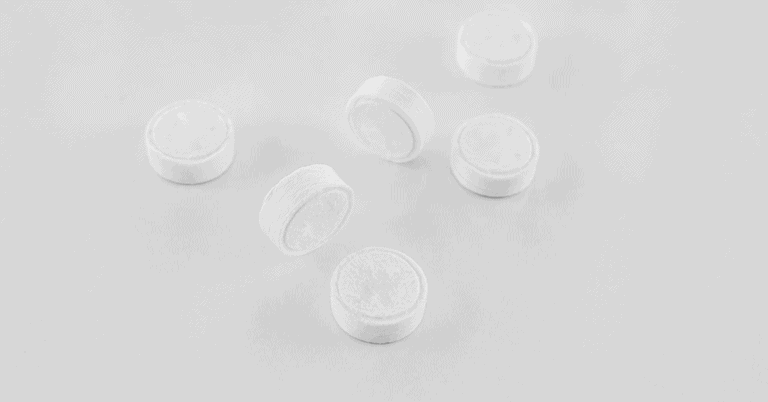
A starter stick is an indispensable tool for starting fires outdoors. It is typically made of trim, cylindrical wood treated with wax or petroleum jelly, making it easier to ignite and keep burning.
Unlike kindling or additional fuel sources, starter sticks don't need any kindling or other energy sources; they are ready-to-go and will burn for up to 10 minutes without extra fuel required. As a result, these versatile sticks can be used on campfires, barbecues, or fireplaces!
Essential Items to Start a Fire
In addition to the starter stick, several other essential items are necessary for starting a fire:
- Matches or lighter fluid
- Kindling such as twigs, dry grasses, and leaves
- Larger logs or chunks of wood
- Newspaper
- An open area free from debris or structures that could catch fire easily (e.g., tents)
You must also have access to water in case the flames get out of control.
Safety Precautions
When starting a fire with a starter stick, it is essential to take safety precautions such as:
- Wearing protective clothing, including gloves and eyewear.
- Having a first aid kit nearby in case of injury.
- Avoiding flammable materials like gasoline canisters or aerosol cans near the flame area.
- Keeping children away from flames at all times.
- Using only appropriate materials when building your bed (i.e., no leaves).
- Maintaining plenty of oxygen by keeping the flame low until it builds up enough heat energy for sustained combustion (ventilation).
- Never leave the area unattended while your fire burns - permanently extinguished fully before leaving!
Step-by-Step Guide to Starting a Fire
Once you've taken all necessary safety measures and know what a starter stick is, it's time to build your fire.
Begin by gathering all the required items needed for making one:
- Firewood - Kindling and fuel wood (if collected from nature, ensure it is dry)
- The starter sticks itself
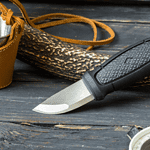
- An axe or saw (optional)
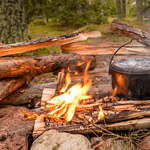
- Something to contain the fire, such as a pit or ring of stones
Create a Fire Bed
Before lighting the starter stick, you should create the fire bed, which will act as its base and help contain it within an appropriate area where it cannot spread out of control.
To do this:
- Remove any debris, such as leaves and twigs, that could spread the flames around quickly if ignited accidentally. Doing this reduces the chance of smoke inhalation since burning debris releases toxic chemicals into the air when burned too close to people or animals.
- Dig a shallow hole in the center of your cleared area using an axe or saw, if necessary, for larger pieces of wood; this will be where you insert the starter stick so it can remain safely contained while providing the required airflow to get a flame going quickly.
Use The Starter Stick
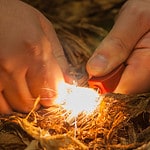
Light one end of your starter stick using matches or another ignition source until a steady flame emanates from its tip in a safe area free from flammable materials.
Apply gradual pressure against the ground surface to keep oxygen flowing evenly along its length; keep hands at least 12 inches away from the heat source at all times.
Insert the burning end into the pre-dug hole within the prepared fire bed without increasing pressure applied at the top side downward; then let go completely, leaving enough space between combustible materials, including yourself, before continuing.
Ignite the Fire
Once inserting the lit end into the pre-dug hole within the prepared fire bed, start adding kindling slowly but steadily onto the existing log cabin structure surrounding the lit end until desired size/shape is reached.
Again, ensure there is enough distance between combustible material, including yourself, before touching any parts near the active flame, as even slight contact could result in serious injury due to potential exposure to thermal radiation emitted during the combustion process.
Once desired size/shape has been achieved. Again, there is ample distance left between combustible material and yourself.
Proceed with the final step: ignite remaining logs by either throwing one match directly onto them if small enough quantities are present or layering multiple small sticks along perimeter edges, then lighting those accordingly.
It should create a primary burning cycle that lasts hours, depending on fuel quality/quantity added throughout the process.
Tips to Extend the Fire's Duration
Before lighting a fire, it is essential to create an oxygen-rich fuel base that burns slowly and steadily. Then, add small pieces of wood or fuel like dried grass, twigs, pinecones, bark chips, leaves, paper scraps, or other combustible material that will catch fire quickly.
To guarantee your kindling stays lit throughout the night, ensure it is dry and moisture-free before adding them to the pit.
Create a Log Cabin Structure
A log cabin structure can help keep heat within your fire pit and keep the wind from blowing out the flames.
To build one, start by placing four large logs around the perimeter in an alternating pattern so each record faces perpendicular to its neighbors (two facing up, two facing down).
Then fill in smaller pieces of kindling inside this square until you reach its top; this should create a stable platform for larger pieces of wood or logs without consuming too much oxygen, keeping your fire burning longer during cold nights.

Conclusion
Starting a fire with a starter stick is an effortless and convenient way to create an everlasting flame. From gathering supplies and adding kindling or logs, this step-by-step guide will show you how to make the most of this simple tool - always remember to practice safety precautions!
With these tips, you can build the most successful campfire ever! So don't wait any longer; get out there and light up those campfires today!